Step-by-Step Guide to Creating Your First Handmade
Creating a unique and personal handmade greeting card is more than just assembling pieces of paper; it’s crafting heartfelt gifts that convey thoughtfulness and creativity. In a world dominated by digital communication, a handmade greeting card stands out as a personal and intimate gesture. Whether you’re an experienced crafter or a beginner, creating a handmade greeting card is an enjoyable process that allows you to explore artistic expressions and share them with others. This guide will provide a comprehensive step-by-step approach to creating your first handmade greeting card, ensuring you have fun and learn essential crafting techniques along the way.
Gathering Your Materials
Before you start creating, it’s important to gather all the necessary materials. Here’s what you’ll need:
-
Cardstock and Card Bases: This will be the base of your card. Choose high-quality cardstock or pre-cut card bases that can hold up to folding and decorating. White cardstock is highly recommended due to its quality and versatility for various decorating techniques.
-
Cutting Tools and Paper Trimmer: A pair of sharp scissors, a craft knife for precise cuts, and a paper trimmer for achieving clean, straight lines, especially when creating card bases and trimming patterned paper.
-
Ruler and Cutting Mat: These will help you measure and cut straight lines.
-
Adhesives: Double-sided tape, glue sticks, or liquid glue, depending on your preference and the materials you’re using.
-
Decorative Elements and Patterned Paper: Think about stickers, ribbons, buttons, or any other embellishments you like, and don’t forget to include patterned paper to add visual interest to your cards.
-
Markers, Pens, or Paints: For adding color and details.
-
Stamps, Stamp Set, and Ink Pads: If you want to include stamped designs, ensure you have a versatile stamp set that includes both images and sentiments, and don’t forget the ink pad for adding designs with your stamps.
Optional:
-
Embossing Powder and Heat Gun: For adding raised details.
-
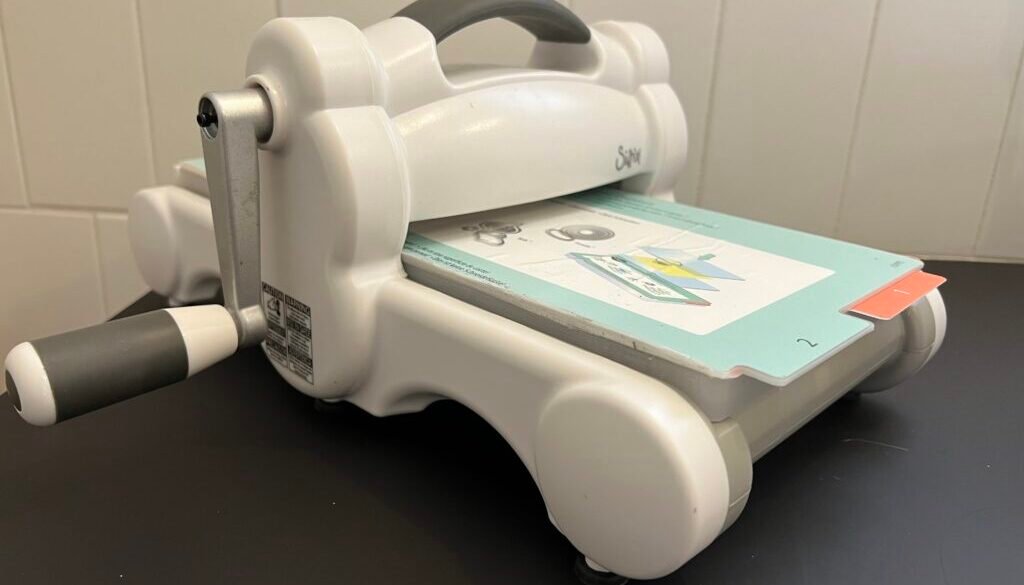
Die-Cutting Machine: If you plan on using intricate cut-out designs.
Most of these materials can be easily found at your local craft stores, making it convenient for beginners interested in stamping and crafting to start their projects.
Designing Your Own Greeting Cards
Choosing a Theme and Color Scheme
Start by deciding on the occasion for the card (e.g., birthday, thank you, holiday). This will guide your theme and color choices. For instance, a birthday card might be bright and festive, while a sympathy card would be more subdued.
Sketching Your Design
Sketch a rough layout on a piece of paper to plan the placement of your text and decorations. This doesn’t have to be perfect; it’s just to help you visualize the card’s look.
Preparing Your Card Base
Selecting the Right Paper
Cardstock, especially high-quality white cardstock, is ideal for the card base. It’s not only sturdy but also provides a professional-looking and visually appealing foundation for your greeting cards. White cardstock is particularly valued for its versatility, allowing for a wide range of design elements to be added on top. Its weight and texture are perfect for creating cards that stand out, and it pairs beautifully with colorful cardstock to achieve various effects. When selecting your cardstock, consider white cardstock for its ability to enhance and complement your design.
Cutting and Folding Techniques
Cutting: Measure your cardstock to the desired size and use a paper trimmer to achieve clean, straight lines. A paper trimmer is essential for cutting cardstock for bases and accent layers, ensuring precise cuts every time. A typical card size is 5×7 inches when folded.
Folding: Fold your cardstock in half neatly. Use a bone folder or the back of a spoon to make a sharp crease.
Decorating Techniques
Stamping, Embossing, and Using Die-Cuts
-
Stamping: Selecting a versatile stamp set that includes both images and sentiments is crucial for stamping. Apply ink from a quality ink pad to your stamp and press it firmly onto the cardstock. The right ink pad can significantly affect the outcome, ensuring vibrant colors and crisp images. Practice on scrap paper first to get a feel for the pressure needed.
-
Embossing: After stamping with a carefully chosen ink pad and stamp set, sprinkle embossing powder over the wet ink, shake off the excess, and heat it with a heat gun until it melts and raises.
-
Die-Cuts: If you have access to a die-cutting machine, use it to cut intricate designs from different colored papers and layer them on your card.
Adding Textures with Layers and Embellishments
Layer different materials like paper, fabric, or thin metal sheets to create depth. Introduce texture and color by incorporating patterned paper as a layering element. Add embellishments like ribbons, buttons, stickers, or washi tape to enhance the visual interest of your card. Washi tape can be a simple yet effective way to add decorative patterns alongside other items.
Writing a Personalized Message
Tips for Crafting Heartfelt Messages
The message inside your card carries your emotional intent and personalizes your creation. Start by thinking about your relationship with the recipient and the occasion. Here are some tips:
-
Be Sincere: Write from the heart. Authentic messages resonate more deeply than clichés.
-
Keep It Simple: Especially if you’re new to card making, a simple message can be more effective and meaningful.
-
Use Quotes or Poems: If you’re stuck, a quote or a short poem can beautifully convey your feelings.
Using Calligraphy or Decorative Handwriting
If you want to add an elegant touch to your card, try using calligraphy or decorative handwriting. You can find basic tutorials online or practice with calligraphy markers. Even simply changing your writing style to be a bit more decorative can make a big difference.
Assembling the Card
Step-by-Step Assembly Instructions
-
Layout Your Design: Before gluing anything, place all your decorative elements on the card as you planned in your sketch. This allows you to make last-minute adjustments.
-
Start With Larger Pieces: Begin by adhering the larger background pieces first. Use double-sided tape for flat layers and foam tape for raised elements to add dimension.
-
Add Decorative Elements: Once the base layers are in place, continue with smaller decorative items. This might include stickers, die-cuts, or handmade embellishments.
-
Apply Adhesives Carefully: Use the right type of glue for each material. For instance, liquid glue might work better for heavier items like buttons, whereas a glue stick could suffice for paper or light fabric.
Securing Decorations and Ensuring Durability
Ensure that all elements are securely attached. If you’re using heavier or bulkier decorations, consider additional reinforcement with more adhesive or even stitching them with a needle and thread for a unique touch.
Finishing Touches
Adding Final Embellishments
Once your card is assembled, you might want to add a few last-minute details:
-
Glitter or Gloss: A light dusting of glitter or a gloss medium can add a festive sparkle, especially for holiday or celebration cards.
-
Washi Tape: Incorporate washi tape for a versatile and easy-to-use embellishment. Its variety of patterns and colors can complement any card design, alongside other items like flowers, stickers, and ribbon.
-
Personal Touches: Consider adding a personal touch like a photo or a small keepsake that has meaning to both you and the recipient.
Protective Measures for Mailing
If you plan to mail your card:
-
Use a Protective Envelope: Choose a sturdy envelope that fits your card snugly without bending it.
-
Consider Padding: For cards with bulky elements, a bit of bubble wrap can prevent damage during transit.
-
Check Postage: Ensure your card doesn’t exceed weight limits for standard postage to avoid extra charges.
Congratulations on completing your first handmade card! This process not only allows you to create something unique and personal but also helps develop your creative skills. Each card you make will improve your technique and expand your artistic abilities. Share your creations with friends and family or on social media to inspire others with your work.
Remember, the beauty of card making lies in the personal touch—it’s the thought and effort that count the most. Keep crafting, keep experimenting, and most importantly, have fun with every card you create!


